Tired of scorched kernels and half-popped batches when you crave that classic movie-night snack? The allure of homemade popcorn is undeniable: the irresistible aroma, the satisfying crunch, and the sheer freshness that microwave bags simply can't match. Yet, many home cooks shy away from the stovetop method, fearing the dreaded burnt bottom or a pot full of unpopped "old maids."
The good news? Achieving perfect, fluffy, non-burnt stovetop popcorn is not only possible but surprisingly simple. It's a fundamental kitchen hack how to pop popcorn on the stove top video tutorials frequently showcase because, once mastered, it transforms your snack game. Forget complicated gadgets; with just a few basic ingredients and the right technique, you can elevate your popcorn experience from mediocre to magnificent in under 10 minutes. Get ready to discover the secrets to a flawless pop every single time!
Why Choose Stovetop Popcorn Over Microwave Bags?
In our fast-paced world, the microwave offers undeniable convenience. However, when it comes to popcorn, the stovetop reigns supreme for several compelling reasons:
- Superior Flavor & Freshness: Pre-packaged microwave popcorn often contains artificial flavors, preservatives, and questionable chemicals. Stovetop popcorn, made with fresh kernels and quality oil, boasts a clean, vibrant taste that's simply unparalleled. You control every ingredient, ensuring a purer, more authentic flavor profile.
- Healthier Control: By making your own, you dictate the type of oil, the amount of salt, and any additional seasonings. This means you can avoid hydrogenated oils, excessive sodium, and other additives often found in store-bought options, making it a healthier choice for you and your family.
- Cost-Effective: A bag of unpopped kernels is significantly cheaper than individual microwave bags. Over time, making your own popcorn from scratch will save you a considerable amount of money.
- Customization Galore: Stovetop popcorn is a blank canvas for culinary creativity. From savory nutritional yeast and garlic powder to sweet cinnamon sugar or even a drizzle of chocolate, the seasoning possibilities are endless. You can tailor every batch to your exact craving.
- The Full Sensory Experience: There's a certain magic to the rhythmic popping sound, the comforting smell filling your kitchen, and the anticipation of that first fluffy bite. It’s a nostalgic experience that a beeping microwave simply cannot replicate.
Gathering Your Essentials: Ingredients & Equipment for Perfect Popcorn
Before you dive into the popping process, ensuring you have the right components is half the battle. Think of this as laying the groundwork for your perfect batch.
The Best Ingredients for Stovetop Popcorn
- Popcorn Kernels: While there are many varieties, the most common are yellow and white kernels, both widely available at grocery stores. Yellow kernels tend to produce larger, chewier popcorn with a classic "butterfly" shape, perfect for holding toppings. White kernels are typically smaller, more tender, and pop into a "mushroom" shape. Either works beautifully, so choose based on preference or what you have on hand. Always opt for fresh kernels; stale kernels lead to more unpopped "old maids."
- High Heat Oil: This is critical for preventing burning and ensuring even popping. Olive oil (specifically light olive oil, not extra virgin), avocado oil, and coconut oil are excellent choices due to their high smoke points and neutral or subtly complementary flavors.
- Why High Heat? Oils with low smoke points will burn and impart a bitter taste to your popcorn before the kernels even have a chance to pop.
- Flavor Factor: While some prefer a completely neutral oil like avocado, coconut oil can add a lovely, subtle sweetness that's fantastic with salt.
- Can you go oil-free? While technically possible, using a small amount of oil not only aids in heat transfer for more even popping but also helps the salt and seasonings adhere better, resulting in a more flavorful snack. We highly recommend using oil for the best results.
- Fine-Grain Salt: Regular table salt or finely ground sea salt adheres better to the popcorn, ensuring every bite is seasoned. Coarse salt tends to fall to the bottom of the bowl.
- Optional Flavorings: Get creative! A sprinkle of nutritional yeast for a cheesy flavor, garlic powder, smoked paprika, chili powder, or even a dash of cinnamon sugar can transform your popcorn into a gourmet treat.
The Essential Equipment
- Medium to Large Pot with a Tight-Fitting Lid: This is arguably the most important piece of equipment. The size of your pot should accommodate the expansion of your kernels. A good rule of thumb is that 2 tablespoons of unpopped kernels will yield approximately 5 cups of popped popcorn. If you're aiming for a standard batch of about 10 cups (4 tablespoons of kernels), you'll need a pot that can comfortably hold that volume. A heavy-bottomed pot, such as a stainless steel or nonstick one, is ideal as it distributes heat more evenly and reduces the risk of scorching. The lid is absolutely non-negotiable, as it traps the heat for popping and keeps the kernels contained. For more detailed advice on choosing the perfect popping vessel, be sure to check out our guide on Best Oil & Pot for Stovetop Popcorn: Unlock Your Perfect Pop.
- Large Serving Bowl: You'll need somewhere to transfer your fluffy popcorn immediately after it's done popping.
The Ultimate Kitchen Hack: How to Pop Popcorn on the Stove Top Without Burning
This foolproof method ensures maximum pops and minimal burns, turning stovetop popcorn into your new go-to snack. Follow these steps for a truly perfect batch.
Step 1: Prepare Your Pot and Oil
Place your chosen pot over medium-high heat. Drizzle in your high-heat oil (e.g., 2-3 tablespoons for 1/2 cup of kernels). Swirl the pot gently to spread the oil evenly across the bottom. Allow the oil to heat up for about 1-2 minutes.
Step 2: The "Test Kernels" Method – Your Secret Weapon
This is the crucial kitchen hack how to pop popcorn on the stove top video tutorials often highlight for consistent results. Add just 2-3 popcorn kernels to the pot and cover it with the lid. Wait patiently. When these test kernels pop, it’s your signal that the oil has reached the perfect temperature. This prevents both underheating (leading to unpopped kernels) and overheating (leading to burning before the main batch even begins).
Step 3: Add Remaining Kernels & Shake
Once your test kernels have popped, remove the pot from the heat briefly. This allows the pot to cool slightly, preventing the main batch of kernels from burning while you add them. Add the rest of your kernels and a pinch of salt (if desired, some prefer to salt after popping for better adherence). Return the pot to the medium-high heat and cover tightly. Give the pot a good shake every 10-15 seconds to ensure the kernels are evenly coated in oil and don't settle and burn at the bottom.
Step 4: The Pop-a-Thon & Steam Release
After a minute or two, you'll start to hear the kernels popping vigorously. Keep shaking the pot gently but consistently. As the popping intensifies, you can briefly crack the lid slightly a few times during this phase to allow steam to escape. This small how to make perfect stovetop popcorn in under 10 minutes trick helps keep your popcorn light and crispy, preventing it from becoming soggy.
Step 5: Listen Carefully & Remove Promptly
Continue popping until the sound of popping slows down significantly – specifically, when there are 2-3 seconds between individual pops. This is your cue to remove the pot from the heat immediately. Do not wait for the popping to stop completely, as residual heat will quickly scorch the remaining kernels at the bottom.
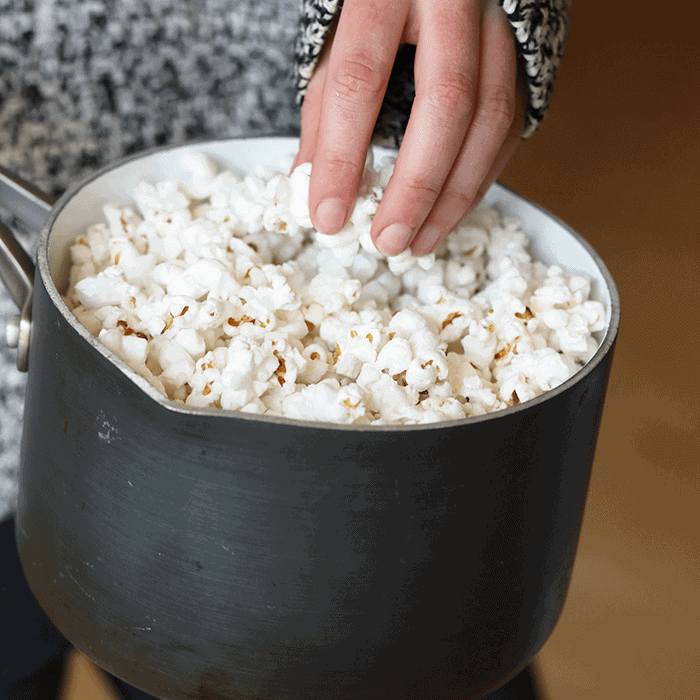
Step 6: Serve and Season
Carefully pour the hot popcorn into a large serving bowl. If you haven't already, add more salt to taste, or toss with your favorite seasonings. A knob of melted butter can also be drizzled over the top to help seasonings adhere and add richness.
Troubleshooting Common Stovetop Popcorn Problems
Even with the best instructions, minor hiccups can occur. Here’s how to tackle them:
- Too Many Unpopped Kernels ("Old Maids"):
- Issue: Oil wasn't hot enough, or kernels are old and dry.
- Solution: Always use the "test kernels" method to ensure optimal oil temperature. Invest in fresh kernels and store them in an airtight container to maintain moisture.
- Burnt Popcorn:
- Issue: Heat too high, not shaking enough, or left on the heat too long after popping slowed.
- Solution: Stick to medium-high heat. Shake the pot consistently throughout the popping process. Remove from heat as soon as pops become infrequent.
- Soggy Popcorn:
- Issue: Steam trapped inside the pot.
- Solution: Briefly crack the lid a few times during active popping to allow steam to escape. Immediately transfer popcorn to an open bowl after popping; do not leave it in the hot pot with the lid on.
- Flavorless Popcorn:
- Issue: Not enough salt, or salt not adhering properly.
- Solution: Use fine-grain salt. You can add a little salt during the popping process, but the best method is often to add salt immediately after popping, while the popcorn is still warm and slightly oily. A light spray of cooking oil or a drizzle of melted butter can also help seasonings stick.
Mastering stovetop popcorn is a rewarding kitchen hack how to pop popcorn on the stove top video guides strive to teach. It's a skill that brings fresh, delicious, and customizable snacks within easy reach, transforming ordinary movie nights or casual gatherings into something special. By following these simple steps – paying attention to oil temperature, kernel freshness, and timely removal – you can consistently achieve fluffy, perfectly popped kernels without the worry of burning. Say goodbye to microwave bags and hello to the superior taste and experience of homemade, stovetop goodness. Your next snack craving, and your guests, will thank you!
